
Introduction
TTSFree AI is an offline desktop text-to-speech app for Windows and Mac. It’s built for people who need to turn large amounts of text into natural-sounding audio without relying on the cloud or dealing with usage limits. Whether you’re working on audiobooks, video narration, training materials, or long documents, the app lets you process everything locally on your own computer.
System requirements
TTSFree AI runs on Windows 10/11 and macOS 13 or later.
The hardware you need depends on which TTS engine you use:
- If you use the built-in system voices (Windows or macOS), there are no special requirements.
- If you use QWen3-TTS, you’ll get better performance with:
- CPUs: Intel or AMD (x86_64)
- GPUs: NVIDIA (CUDA), AMD (ROCm), or Intel Arc for faster processing
- Apple Silicon: M1 through M4 chips (optimized with Metal)
You can still run the AI models on CPU only, but generation will be slower.
Download and install
You can download TTSFree AI from either the official TTSFree.ai website or the PopPop.ai website. Both are official sources.
How to download and install on Windows
- Go to the official download page: https://ttsfree.ai/download
- Click the Windows option (Windows 10/11, 64-bit only).
- Download the installer file.
- Open the file once the download finishes (usually in your Downloads folder).
- Follow the on-screen steps (Next → Install → Finish).
- Launch TTSFree AI from the Start menu or desktop shortcut.
How to download and install on Mac
- Go to the official download page: https://ttsfree.ai/download
- Choose the correct version for your Mac:
- Intel Mac (Intel chip)
- Apple Silicon (M1 / M2 / M3 / M4)
- Download the .dmg file.
- Open the downloaded .dmg file.
- Drag the TTSFree AI icon into the Applications folder.
- Open the Applications folder and double-click TTSFree AI to launch it.
If macOS blocks the app the first time, go to System Settings → Privacy & Security and click Open Anyway.
How to use TTSFree AI
Once the app is installed, you’re ready to start converting text into speech. The interface is straightforward: you open or create a project, add your text or documents, choose voices, adjust settings if needed, and generate the audio.
How to download and apply a TTS engine
Before you start converting text to speech, you need to choose the TTS engine you want to use and download it if necessary. TTSFree AI currently offers the following engines:
| Model | Size | Key Features | Best For | Needs Download |
|---|---|---|---|---|
| QWen3-TTS 1.7B | 6.12 GB | High speech quality, natural prosody, expressive intonation | Professional voiceovers, long-form content, highest audio quality | Yes |
| QWen3-TTS 0.6B | 2.05 GB | Good quality with lower hardware demands | Everyday use, real-time work, computers without a strong GPU | Yes |
| Kokoro-82M | ~337 MB | Lightweight, runs well on CPU, real-time speed, low memory use | Laptops and lower-spec machines, fast generation | Yes |
| Native TTS Engine (Windows / macOS) | 0 MB | Built-in system voices, instant, no extra resources | Quick tests, accessibility, or when you want zero setup | No |
If you choose the native TTS engine on your PC or Mac, you can start right away without downloading anything. For the other engines, you’ll need to download and enable them first.
You can also enable multiple TTS engines at the same time. This lets you use AI voices from different models within the same document.
To download and apply a TTS model:
- Click the Model Manager icon (located above the Settings icon).
- Select the model you want and click Download.
- When the download finishes, select the model(s) and click Enable to apply them.
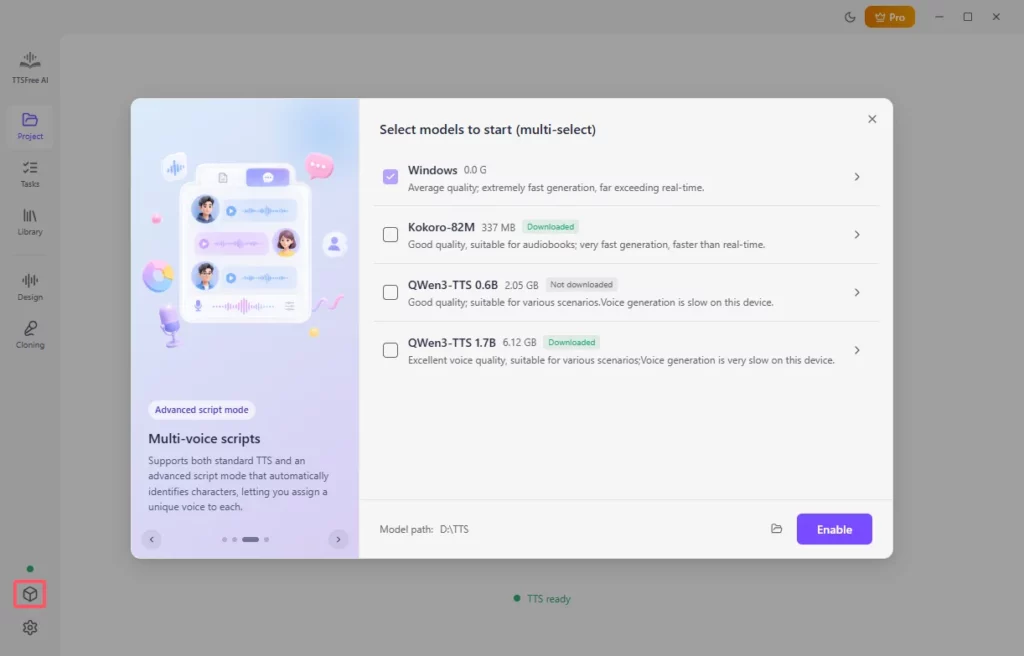
Once a model is enabled, its voices will become available for you to use in your projects.
How to start a project
TTSFree AI is designed mainly for heavier text-to-speech work, so it uses a project-based workflow. To begin, you either create a new project or open an existing one.
Opening a project simply means choosing a folder on your computer, such as the folder where you keep your documents. The app will then automatically import all the supported files inside that folder.
To open a project:
- Click the Open project button.
- Select the folder you want and click Select Folder.
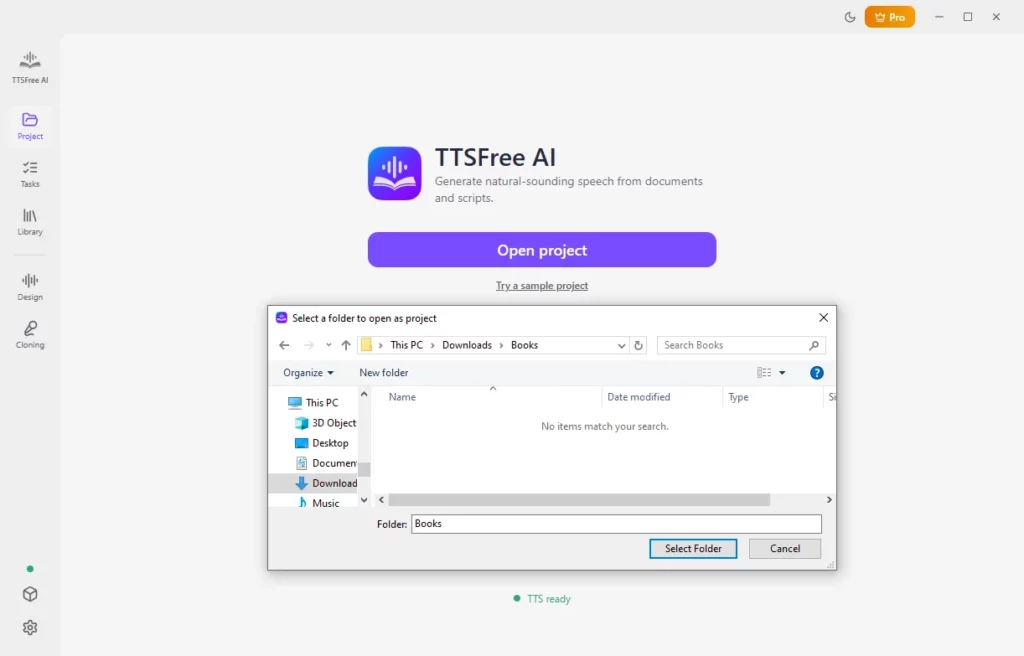
Once the project is open, you can start working with the imported files right away.
How to import a new file or create a new file in your project
Once you open a project, you can select any file in it and start converting text to speech. You can also bring in new files or create a blank one from scratch.
To import a new file:
- Click the Import document icon and choose the file format you want to import.
- Select the file and click Open to add it to your project.
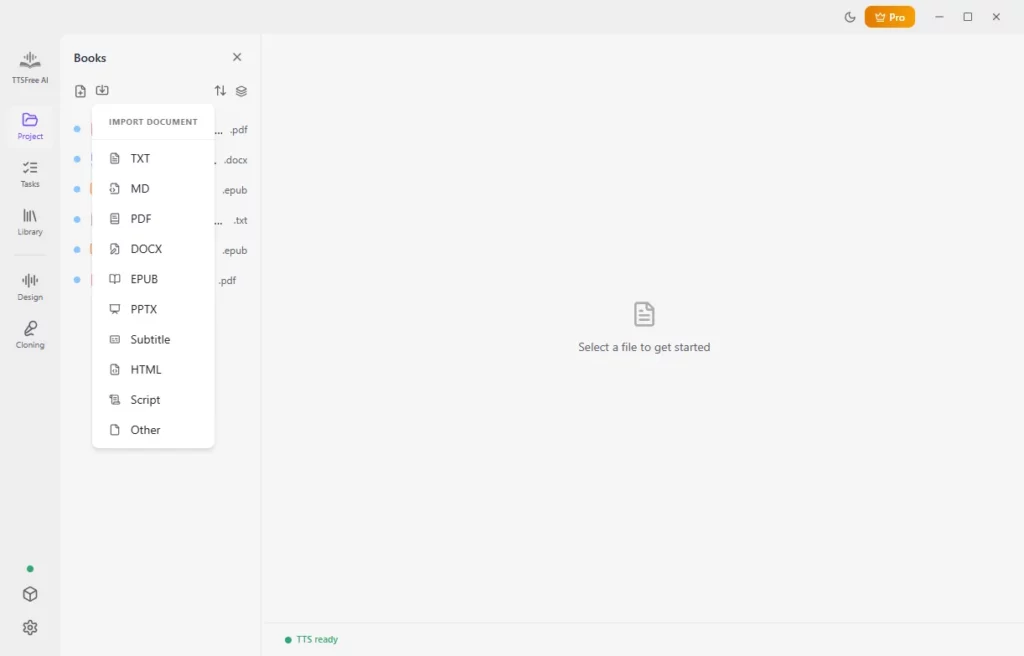
To create a new file:
- Click the New text icon.
- Hover over the untitled file and click the edit icon to rename it.
- Type or paste the text you want to convert.
How to choose a voice
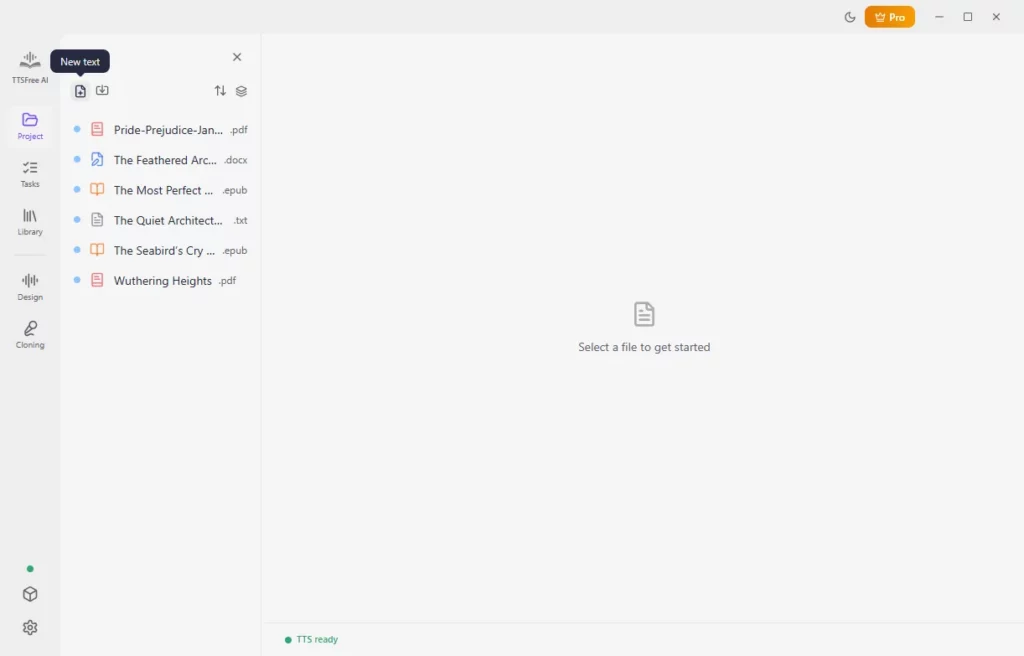
When you select a file, the app automatically assigns a default AI voice to the document. You can change it to any other available voice, depending on the TTS models you have enabled. You can use one voice for the entire file or assign different voices to individual paragraphs.
To switch an AI voice:
- Select a paragraph and click the AI voice avatar, or click the Switch voice button in the right panel.
- Click the play button to preview voices, then choose the one you want. This includes designed voices, cloned voices, and the AI voices from the TTS engines you have enabled.
- If you want to apply the selected voice to the whole file, click Set as file voice.
- In the pop-up, you can choose to apply only the voice, or also include any adjustments you have made (such as speed, pitch, and volume). To adjust these settings, click the Voice options icon after selecting a voice.
How to customize the audio format
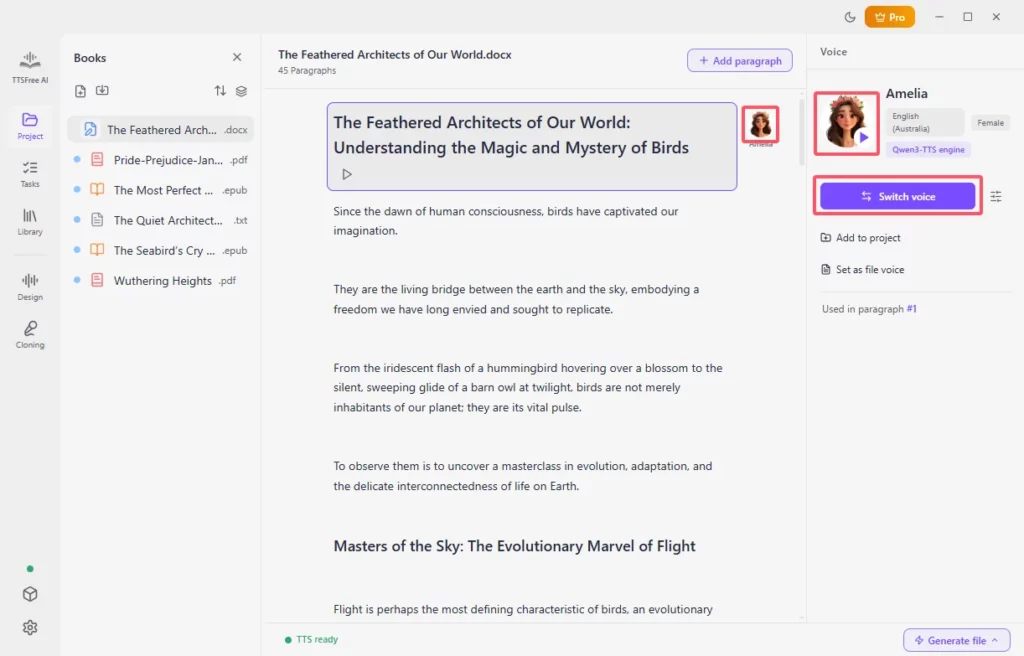
TTSFree AI supports three output formats: MP3, WAV, and M4A/M4B. MP3 works well for everyday use and wide compatibility, WAV keeps the highest audio quality, and M4A/M4B is ideal when you are creating audiobooks. You can set your preferred format in Settings.
- Click the Settings icon and go to the Audio format option.
- Open the dropdown and choose the format you want.
- The new setting will apply to future generations.
How to convert text to audio
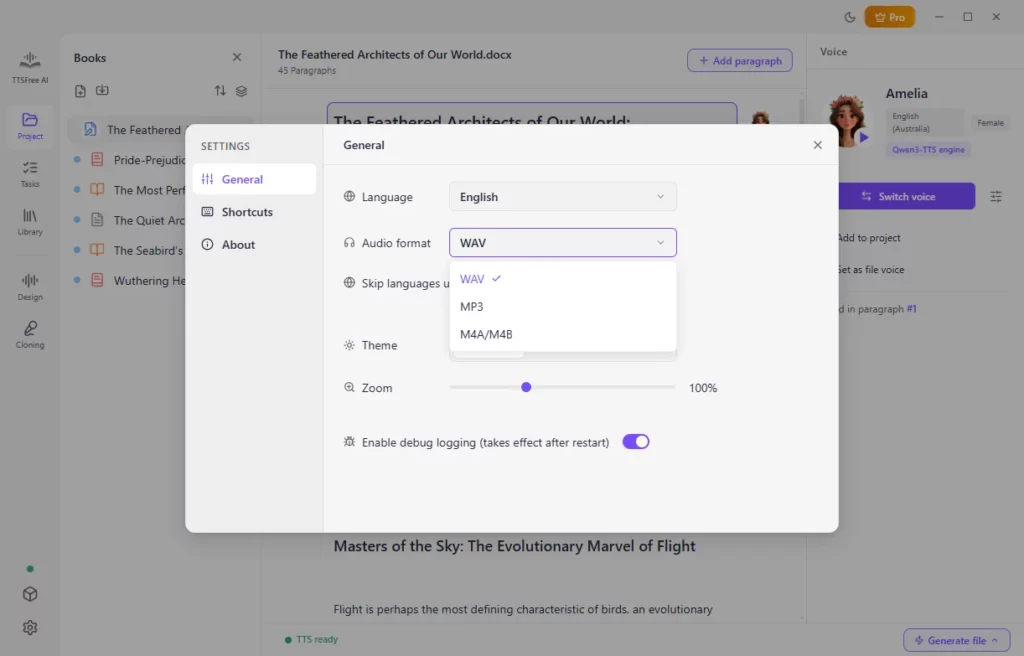
Once you have set up the AI voice, you can start converting text to audio. Depending on what you need, click Generate and play to convert a single paragraph, or click Generate file and then Generate all to convert the entire document.
Where to find the generated audio files
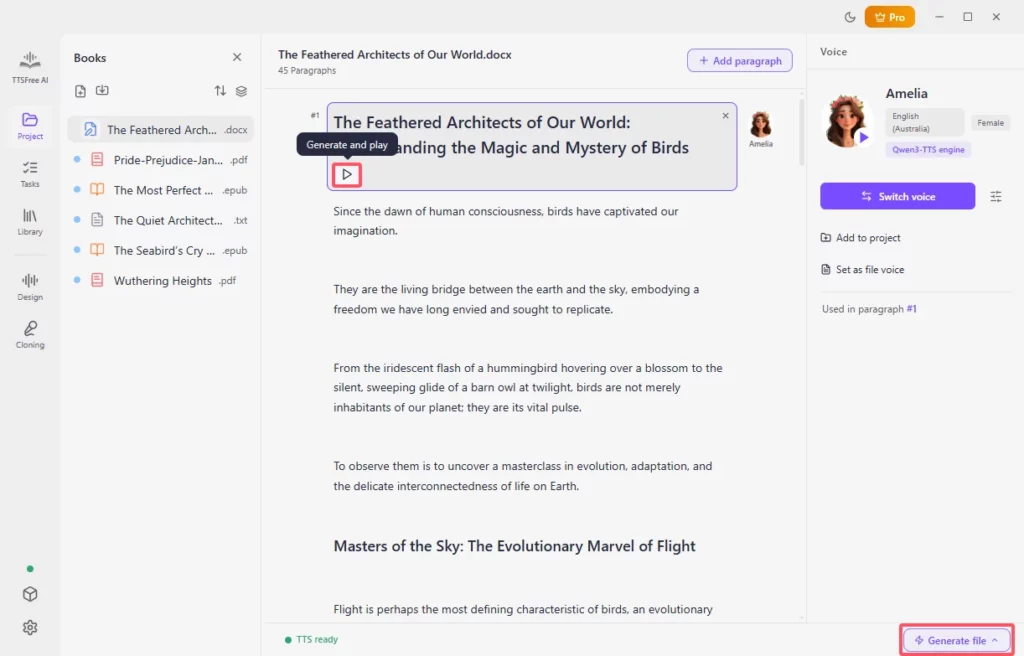
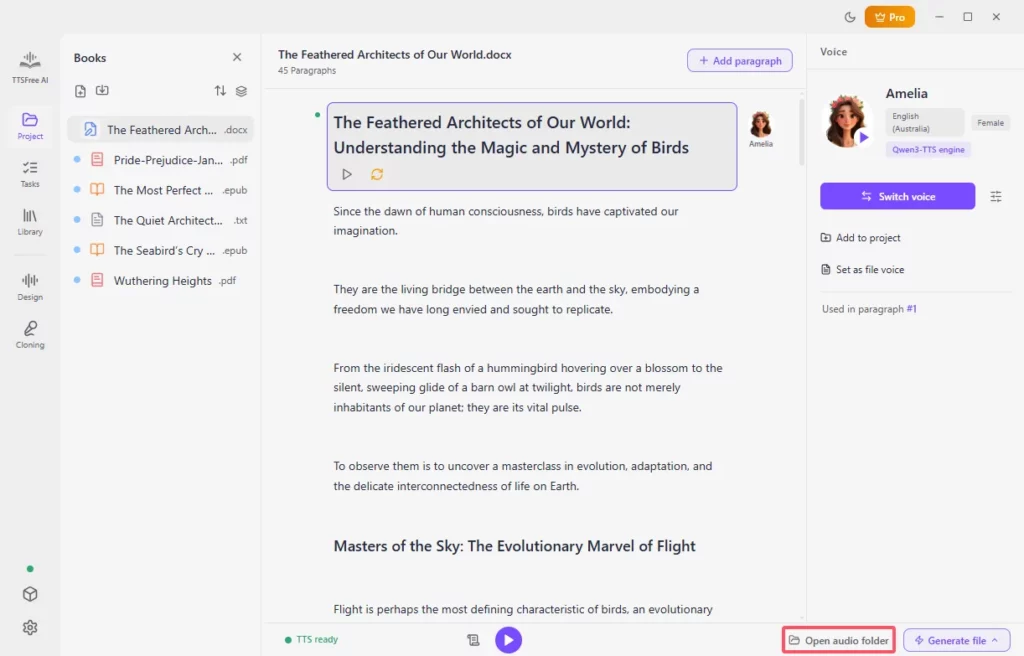
With TTSFree AI, you do not need to download the generated audio files manually. By default, they are saved in the project folder you selected. You can open the folder yourself, or simply click the Open audio folder button to access the files.
How to bulk convert files to speech
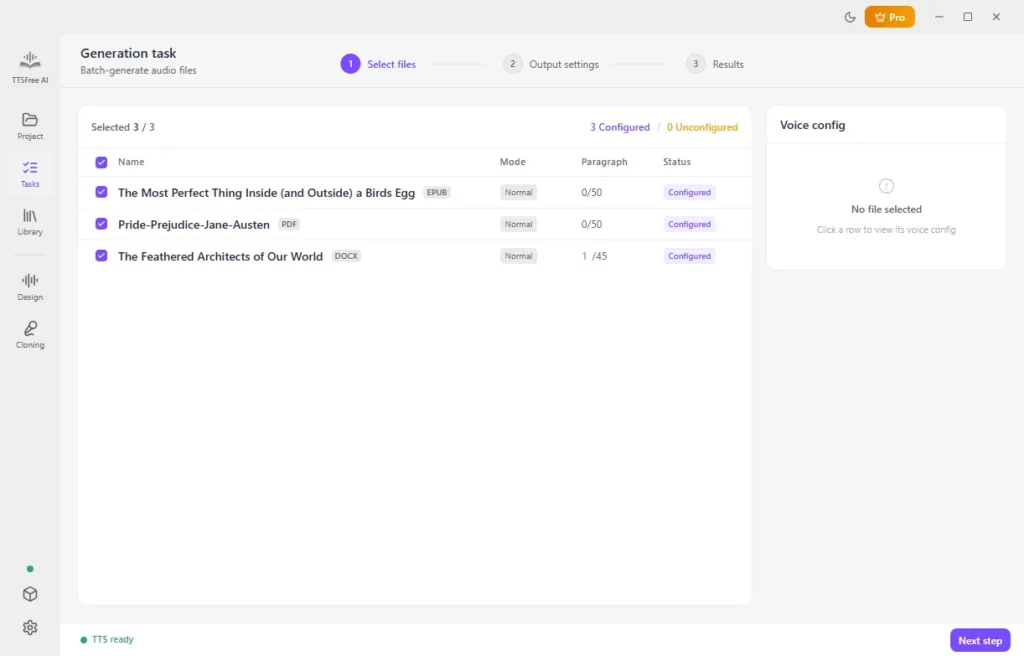
When you need to convert several files into audio at once, use the Tasks feature.
- In the Project panel, assign AI voice(s) to the documents you want to convert.
- Switch to the Tasks tab. It will load all the files that already have AI voices assigned.
- Select the files you want to convert and click Next step.
- Set the output options, such as format, whether to skip paragraphs that have already been generated, and whether to keep the individual paragraph audio files. Then click Start Task.
- The app will convert the selected files one by one. You can follow the progress in the results section.
What does the Library include?
The Library panel shows all the AI voices available for your projects.
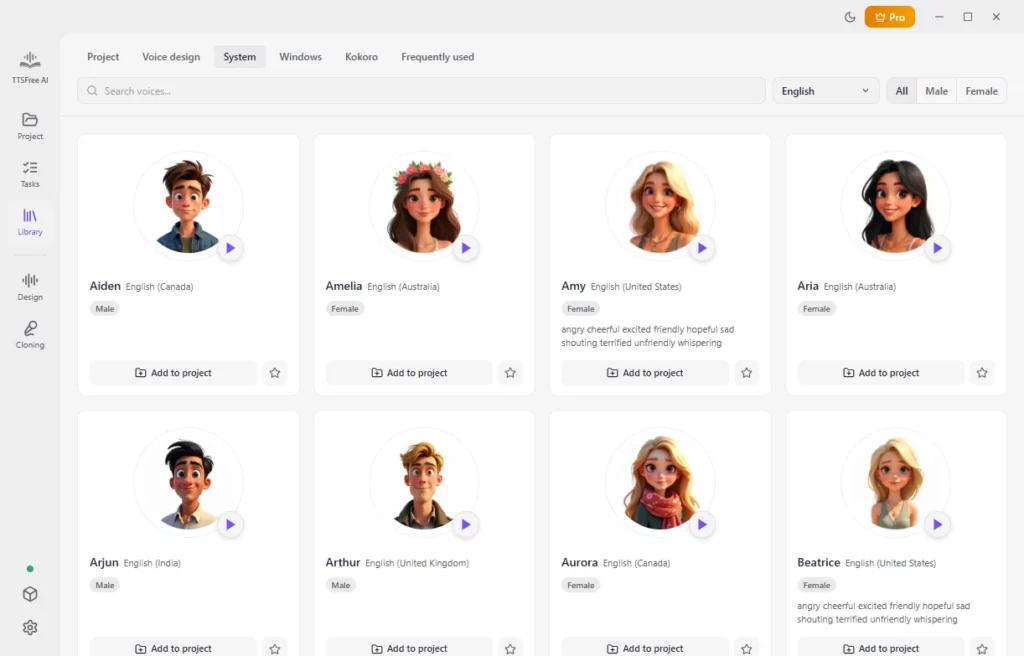
It is organized into several groups:
Project
Voices you have manually added to the current project by clicking Add to project.
Voice design
Custom voices you created with the Design feature, as well as voices you made with the Cloning feature.
System
The AI voices provided by TTSFree AI. You need to enable one of the QWen3-TTS engines to use these voices.
Windows / macOS
The voices that come with the built-in TTS engine on your computer.
Kokoro
The voices provided by the Kokoro TTS engine.
Frequently used
The voices you have used most often in your projects.
How to design a voice
TTSFree AI lets you create custom AI voices that match exactly what you need. There are two ways to do this: design a completely new voice from a text prompt, or fine-tune an existing voice.
Create a new voice with Voice Design
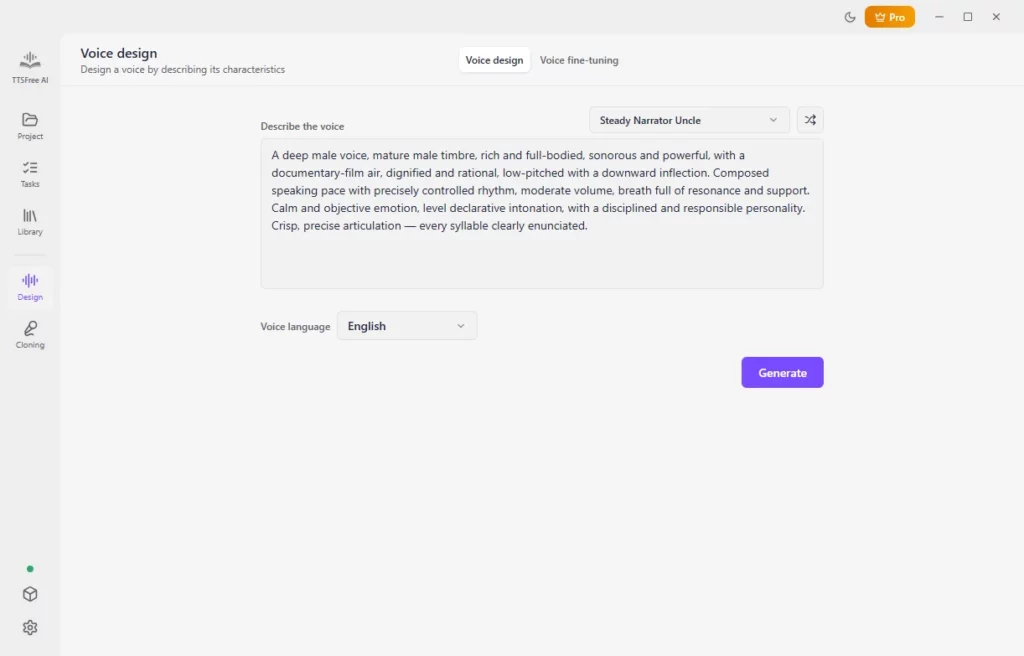
- Go to the Design section.
- Enter a clear description of the voice you want (for example, age, tone, accent, or speaking style). If you need ideas, open the Show Example dropdown or click the Random Prompt icon.
- Select the target language.
- Click Generate.
- Preview the results. When you find one you like, give it a name, add an avatar if you want, and click Save voice.
The new voice will appear in your Library under Voice Design and can be used in any project.
Fine-tune an existing voice
- In the Design section, switch to Voice fine-tuning.
- Select the source voice you want to adjust.
- Enter a prompt describing the changes you want (you can also use examples or the Random Prompt option).
- Choose the target language and click Generate.
- Preview the variations and save the one that works best for you.
Once saved, the fine-tuned voice is available in your Library for future projects.
How to clone your voice
Note: The Cloning feature requires the QWen3-TTS engine to work.
You can clone your own voice and use it for text-to-speech generation. The language you speak in the recording does not limit where you can use the cloned voice. Once created, it works with any language supported by QWen3-TTS.
To clone your voice:
- Go to the Cloning feature.
- Read the on-screen instructions, then click I agree & start verification.
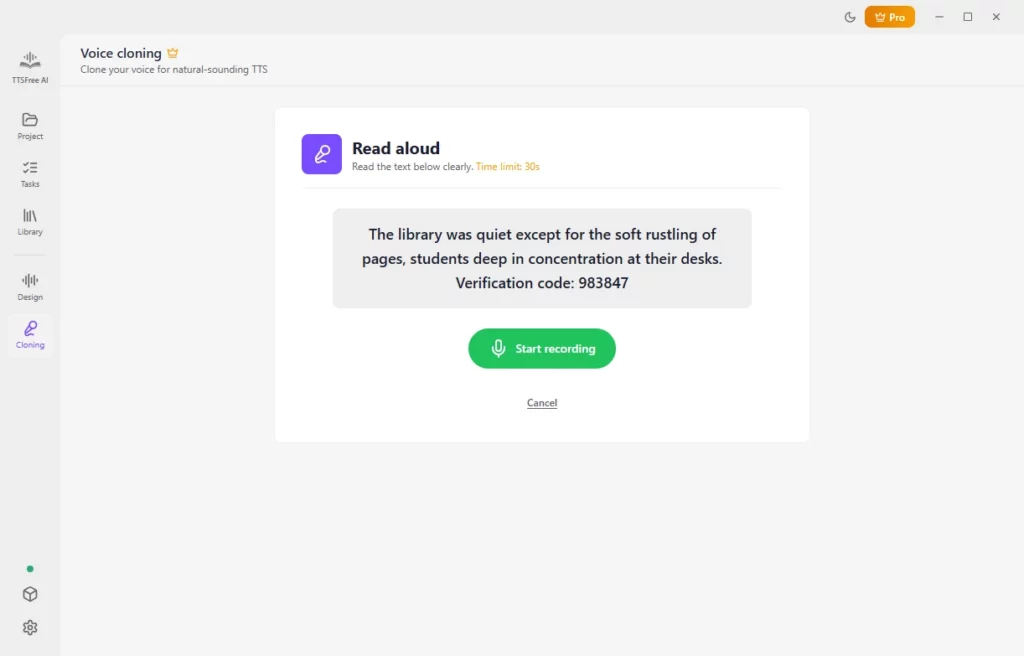
- Click Start recording, read the text shown on the screen, and click Stop recording when you finish.
- After verification passes, set an avatar and name for the voice, then click Start cloning.
- The cloned voice will be saved in your voice library. You can use it freely in any of your TTS projects.
TTSFree AI FAQs
Find answers to the most frequently asked questions about TTSFree AI.
Does the 14-day free trial have any limits?
The only limitation is on voice cloning: you can try up to 3 cloned voices and 3 short paragraphs. Everything else is fully available with no restrictions. You can convert as many files as you want and use any of the built-in or custom-designed voices.
Does it work offline?
The app needs an internet connection when it first launches to check the activation status. It also needs to download voice resources the first time you use a new voice or model. After that, the actual text-to-speech conversion runs completely offline.
Why is the first generation slower?
The first time you use a particular voice, the app may need to download the related resources, which makes the process a bit slower. Generation speed also depends on the TTS model you choose and your computer’s hardware.
Will the changes I make affect the original file?
No. Any edits or conversions you do inside TTSFree AI will not change your original files.
That’s everything you need to get started and make the most of TTSFree AI. We hope this guide helps you work more smoothly and create the audio you want with less hassle. If you run into any questions or have feedback, feel free to reach out anytime. Enjoy using the app, and happy creating.